|
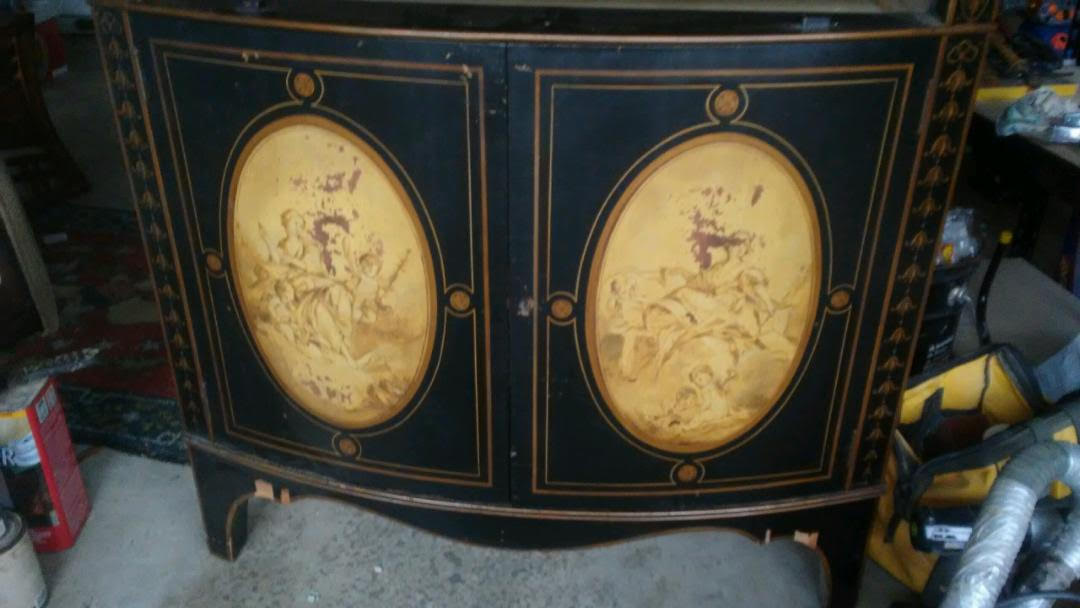
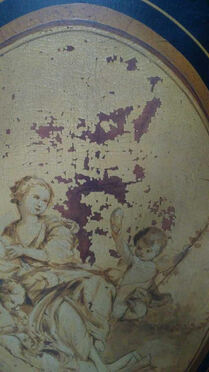
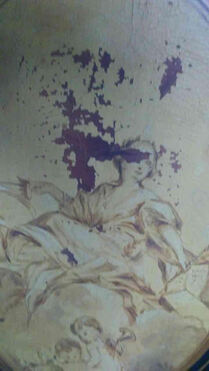
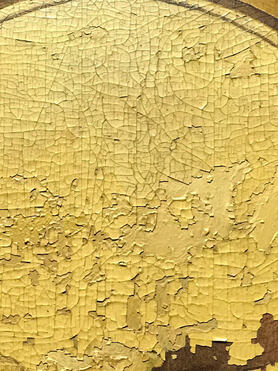
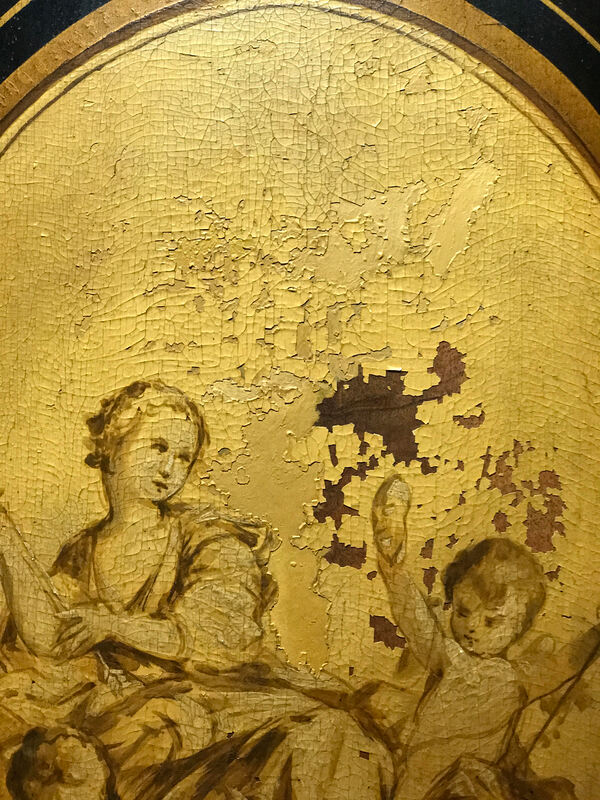
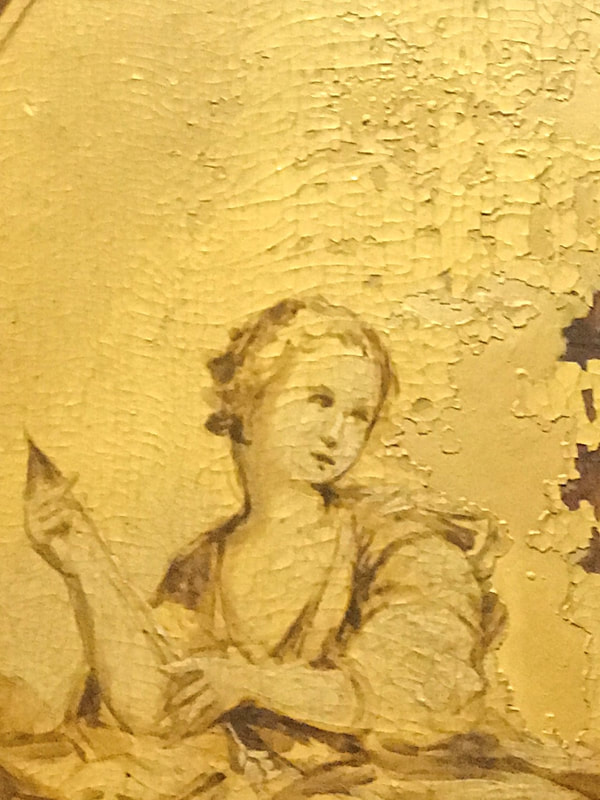
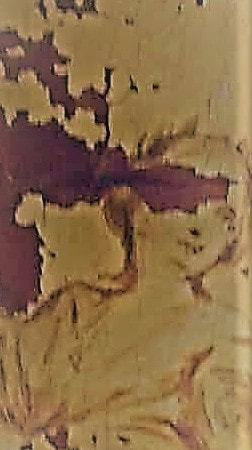
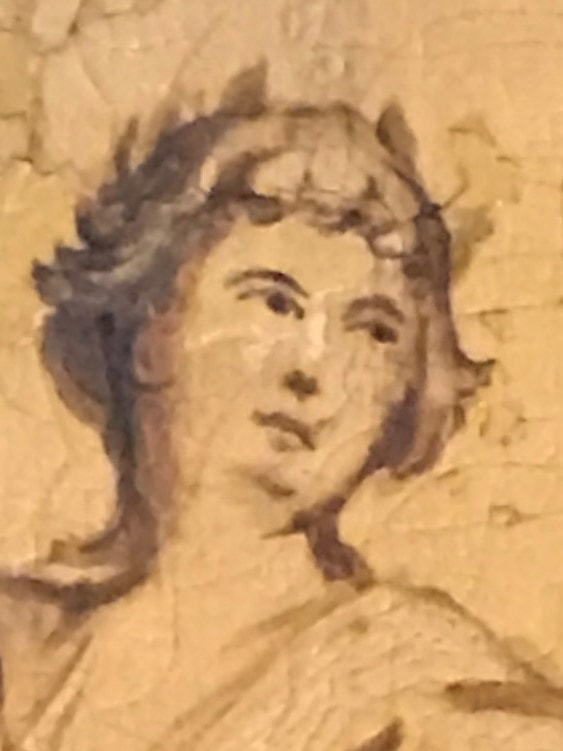
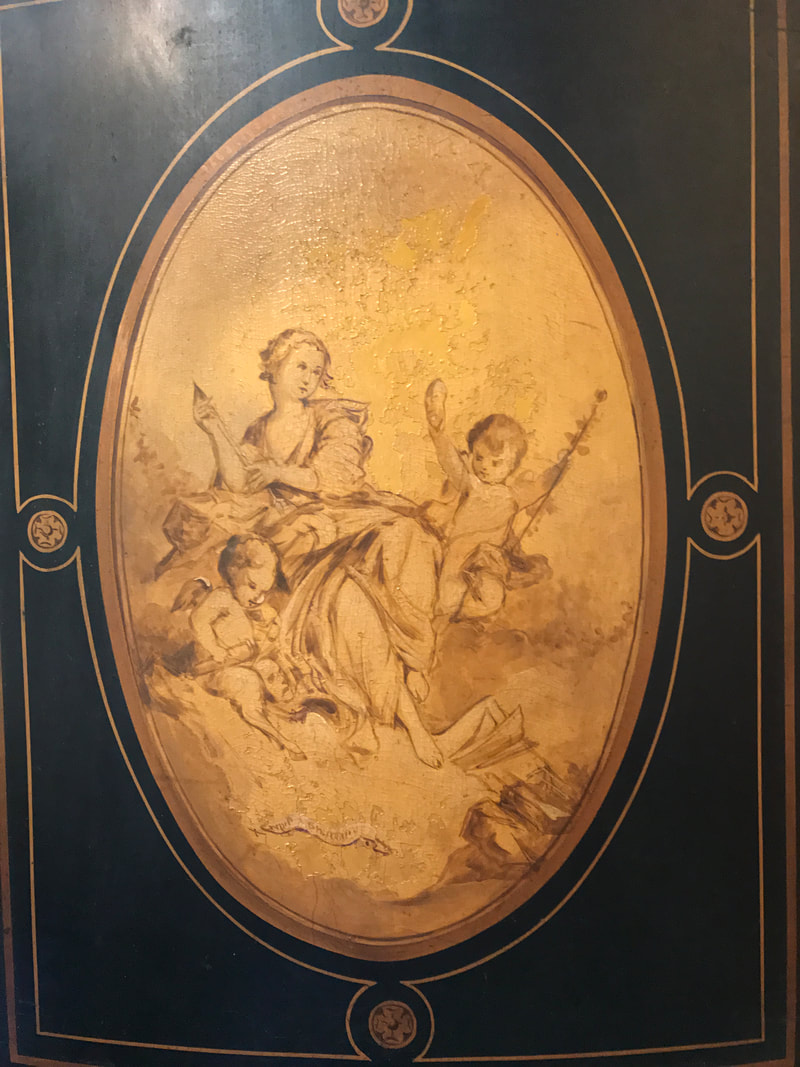
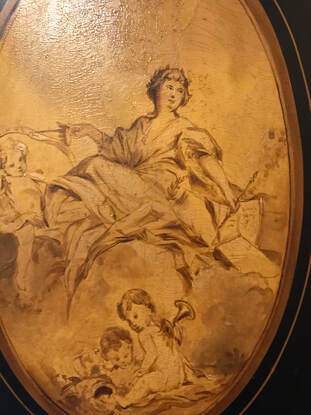
As a child growing up I didn’t know how to ice skate, but I had always wanted to learn. When, as a teenager, my cousins provided me the opportunity to learn with a pair of borrowed skates I welcomed the challenge and soon found out how much fun it could be. The frozen lake near my cousin’s home was where I first learned to put on those skates and step out onto the ice. I quickly learned, however, that the challenge for me was to remain upright! My many attempts at remaining so were met with either landing sprawled out on the ice face-first or sitting on my bum. With determination to succeed and a willingness to learn and lots of practice, I eventually found my footing and balance and, to my delight, marveled at how wonderful the sensation of remaining upright felt! Before long I learned to glide tentatively around on the ice and determined to do more. I skated every chance I had. As my confidence grew, along came spins and loop-de-loops, figure eights and slides and eventually holding hands with cousins and classmates as we skated ‘crack-the-whip’. The best part of all was dancing on the ice with a partner to the music provided by a portable radio. It was thrilling and I felt as if I had climbed the highest mountain! What joy! So how does learning to skate relate to restoring an artwork? The answer is that just like ice skating, it takes lots of practice! Lots of researching the best way to accomplish a goal, studying the methods used by others in restoring artwork, practicing and experimenting with different media and techniques used in painting on various surfaces. Each attempt, whatever its condition, brings you more knowledge and more skill and confidence and once you understand what the project requires, you can accomplish your goal. A fellow artist offered me a collaborative art restoration project and I welcomed the opportunity to work with him in bringing life back to a damaged piece of furniture and artwork. This project came in the form of a beautiful antique cabinet that needed repairing (his job) but with doors painted with beautiful “romance style” paintings that had been badly damaged (my job). See Figure 1. On first look, the challenge was to educate myself about the period and style of the paintings, then determine what media had been used in painting the art (oil). How was the surface prepared for painting?, what was used for the base layer?, did any of the pigments contain lead?, if the paint was applied in layers how many layers?, and to what degree could I restore the paintings while preserving their integrity? Prior to restoration and due to their fragile condition (Figure 2 & 3) both paintings suffered from extensive damage throughout which included a great deal of cracking and flaking (Figure 4). The damage in Figure 3 shows a section of the painting which I found challenging because I now had a face to restore with no reference to its form other than the surrounding area. Before any work could proceed on the paintings I needed to stabilize them so they could be worked on without causing further damage. Like ice skating, this was a learning process too, requiring researching and experimenting with different media. After carefully cleaning the surface, I applied a very light clear picture varnish to the surface of the cracking and flaking areas using a “Qtip”. Although this took many hours of gentle application the results allowed me to proceed with sanding and priming those areas needing attention without disturbing the fragile areas of the paintings. After carefully and very gently sanding the damaged areas of the painting, I began filling in those areas of missing paint (Figures 5 & 6) by applying colors I had mixed matching as closely as possible the original painting. This was done by applying colors in layers, allowing each to dry before applying the next layer. Some areas took as many as 6 layers. Once the background areas were completed, I began the work of restoring the face (Figure 7 & 8) by applying several layers of paint until I matched the surface of the surrounding areas. Each layer a little lighter than the previous until I was able to flesh out the cheek, eye, forehead and hair area, matching those colors to the original and restoring the facial features as closely as I was able to what the original may have been. Once all of the elements of the paintings had been restored ( Figure 9 & 10) and brought together, the final result was again, two beautiful paintings by an unknown artist painted on a cherished piece of heirloom furniture that a family I had never met welcomed back into their home. Now I call that a great challenge!
3 Comments
|
Behind the ArtOur artists share their experiences in creating their works of art. Comments and questions are welcome! Archives
December 2019
Categories
All
|

 RSS Feed
